Showing posts with label mars. Show all posts

Wednesday, 10 February 2010

Mars

Its been a while since I tried Mars, and its usually been unsuccessful, anyway I thought I'd try again as it was somewhere useful.

I tried first with a standard setup, but wasn't seeing much, and it was really cold, and I couldn't get the focussing right. Anyway, I thought I'd have one more go with a 2x barlow lens in the mix with the webcam, and although the results didn't look much on the screen at the time, I was quite impressed with the results.

See what you think.


Friday, 25 January 2008

A clear night at last

As I sat in the office during the day, I kept sneaking a look out of the window, and there was a fair degree of blue sky visible. There were a few clouds around, but not the solid overcast that has been so common the last few weeks. I didn't dare to hope...

On the drive home, I tried squinting at the sky, to see if I could see stars. Its not very easy though, as you are speeding along to try and glimpse them amongst the street lights and tail lights.

When I jumped out of the car though, it was clear that there were stars visible, and I rushed inside, and took the telescope outside immediately to start cooling down. There seems to be quite a lot of equipment to get carried out to get set up properly. Telescope, battery power tank, hand controller, selection of lenses, table, laptop, power cable for laptop, CCD camera, digital camera, star chart...

Anyway - in between grabbing some bites for tea, and not helping get the children into bed, and loosing the mains adapter, I managed to get all set up. I aligned the telescope, and then jumped to Mars as a first test. I wanted to try out some new ideas with the LPI camera and see what I could do. Unfortunately, Mars is now almost overhead, and the telescope doesn't like such objects quite as much. First its a little harder to see in that position - and the flexible focusing adapter is bent into a 90° angle. Another problem is with the Alt-Az mounting you are close to the issue of gimble lock. When looking upwards, which way is up/down and which way right/left. I'm confused, and so are the telescope motors. I know I want it to go THIS way, but its not so clear which way that is.

Anyway - I did get it on target, but I was rather disappointed with the results.
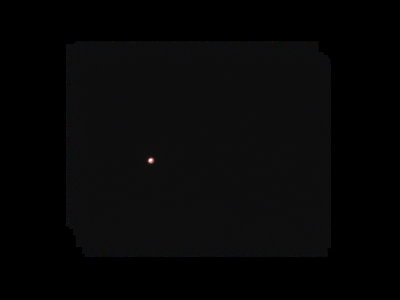
I think it is still overexposed, and clearly more work is needed.

So I waited for a while for the moon to rise. It is full at the moment, so very bright. It rose behind my increasingly least favourite tree in the neighbours garden! So I had a go at imaging that, and the results were better.

This was taken through the branches of the tree, so was subject to a bit of interference. It was about 80 images stacked together. The software has an option to save all the frames for later processing, so I took some more pictures to try processing later.

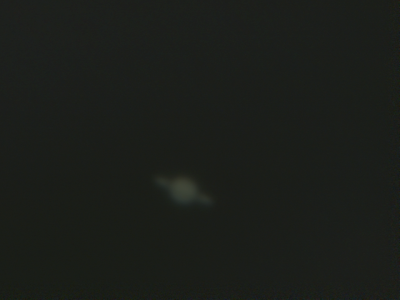
The moon was now out from behind the tree, and Saturn was very closely following it. I had a go at imaging Saturn through the tree, and managed to get some reasonable shots this time. As Saturn is very close to the moon, it is almost lost in the glow from it.

I saved the raw images again to process later. Finally, still not clear whether the LPI camera was giving better results, I took a high magnification lens, and connected the digital camera afocally to it, and took a movie of Saturn. By now I'd been outside in the cold for several hours and was running out of ideas, enthusiasm and warmth, so I wasn't as careful as I could be - it all gets a bit fiddly in the dark and concentration is hard to maintain. After processing in registax, it did look like a recognisable Saturn.

Its at a bit of an unusal angle as I had all sorts of issues getting the camera adapter aligned and connected without thumb screws running into each other.

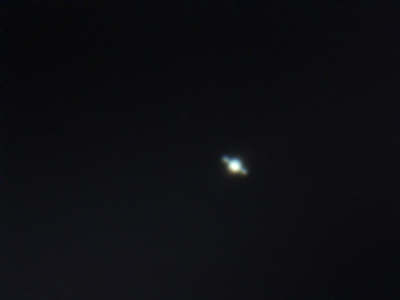
So I took the telescope inside, and packed up. I then went and had a go at reprocessing the raw images, and the registax program is very good. It can be a bit tricky to work with, but the results were more impressive.
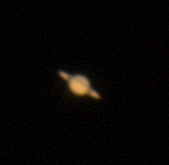
I was pleased to see some reasonable colours coming through too - perhaps I'd got the exposure better.

Finally, a quick processing of the saved moon images too for comparison.
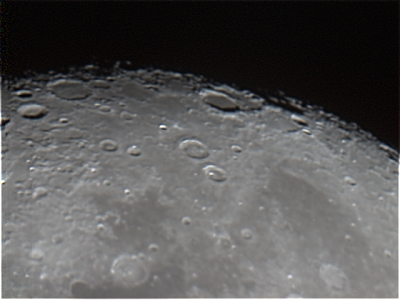
Much better! A good evenings work, I wonder when the next one will come around! Looking out the bedroom window on the way to bed, I was pleased to see in a rather selfish way, that most of the sky was now obscured by cloud. My decision to pack away was vindicated.

Thursday, 10 January 2008

A frustrating evening

I got home to relatively clear skies. My the time I'd had tea, got the children into bed and so on, the sky had cloudy over completely. Then it started to clear and I could see Mars and bits of Orion. I got out the telescope but there was only the odd star visible at a time as clouds drifted passed, so not enough to try aligning it.
Then it clouded over again. About an hour later it was starting to clear in patches again and I could clearly see Orion, so I got out the laptop and the camera attachment.

By the time I had things assembled the cloud had drifted in again and covered it up. Half an hour later when I looked out it was starting to clear a bit again, and for a time it was clear enough to pick some stars for alignment. Then with Mars in the frame I took some images, but they weren't great - there seems to have been a fair bit of high level thin cloud. I think its also overexposing.


It did give me a chance to try it with a 2x barlow lens which looked promising. I also managed to try out Saturn again, but I couldn't really get the focusing right, and it kept drifting in and out of the haze.

So after several hours in the will it, won't it clear mode, I decided to give up and go to bed!

Tuesday, 8 January 2008

My first guided telescope.


So with Christmas over, and no telescope found under the tree, I decided its time to buy something more serious. Like a number of hobbies, you can spend an inordinate amount of money on equipment without trying really. In the end I opt to buy a Meade ETX 125 PE. This is partly because it currently has an offer which includes a number of additional lenses and filters which adds considerably to the value. It has on it a list of things I wanted which includes

  • A GOTO system - after alignment you can tell it to go and locate a given star or planet.
  • A computer interface allowing possible remote control of the telescope from a PC.
  • A reasonable diameter mirror (127mm/5inch).
  • The pack of eyepieces, which range from 40mm (47x mag) to 6.4mm (297x). There is also a barlow lens which allows the doubling of all above magnification.
  • A built in equatorial wedge - this allow the telescope to track in a plane the same as the stars rotate in - so only one direction of track required. Normally it works in Alt-Az mode - which means it has two motors one that moves it around in a circle, and the other is up and down.
I also bought a power tank, which is like a big battery - and can be used for jump starting cars, but supplies enough power to keep the telescope functioning for a number of hours. Finally a small CCD camera which drops in, in place of the eyepiece and can be used for basic moon, planet and other imaging. It can also be used to guide the telescope in conjunction with the computer interface above.

Wonder of wonders, after I get home and play with my new toy in the daylight, the skies clear as it gets dark and I can try it for real.
I tried just looking through it initially, and it was a lot clearer. Then I tried aligning it in auto mode. This is very clever, although it takes 2-3 minutes, which if like me you have to do a few times gets boring quickly. First it finds north, then it works out what the tilt and inclination is, and then it selects where it thinks two stars are it can align with. Well the first star it picked I had no idea - it could have been one of several. I found out later pressing the ? button tells you what star it is thinking it should be, and with stellarium running nearby, this helps a lot. I also found you can skip stars that might not be visible. It is rather sensitive to being interrupted while slewing though. Also realigning without power cycling seems to give rather odd results.

Also so far, the alignment isn't very exact, by picking two widely separated stars it seems to improve. You end up somewhere nearby what you're interested in, but its not always even in the field of view. I'll have to recheck I have input all the correct details.


Mars when viewed was a lot clearer, as were some other things I looked at. After that I spent a while installing the camera software and working out how to get that to go. Then I tried some imaging. This required the laptop close by so the USB cable would reach, and a bit of experimentation.

The results were not too bad, but not as good as I'd hoped - but all this was within a few hours of getting the kit out of the box, and learning how everything worked from scratch. So I guess I should carry on and see what can be done.

Mars was still readily accessible.


Saturn rose - but due to the location I'd picked it rose in between the branches of a tree, and there was intermittent cloud cover, so I was lucky to get anything.

I tried a deep sky object too - the Orion nebula in this case.

Not bad I suppose altogether for day 1.

Friday, 7 December 2007

Finding out how others do it


After my last experiences with Astronomy and telescopes, I decided that photographing things might be more fun. At least I could show the results rather than just describe them.

Now I'd tried before (March 2007) taking some pictures with a telescope and digital camera of a lunar eclipse. This was a very Heath Robinson setup. The telescope is a very basic reflector that I'd borrowed. The camera was a standard point and shoot digital, hand held up to the eyepiece of the telescope. I was actually very pleased with the results given it was a spur of the moment thing. I worked pretty well until the eclipsing happened too much, then the light levels fell, and I couldn't hold the camera still enough to take anything reasonable without a lot of camera shake and the camera waving a red handed blurring gonna happen sort of icon at me.

So - given the very basic nature of the setup it looked like things were possible.

Having got the telescope out again now the nights are getting darker and more accessible, I thought I'd have another go. Bad news, the moon is not visible from my garden, and waning fast. However there are some other things to take photos of. Mars is very prominent right now, and I had a go at taking a photo of that.

No chance, wobblesville Arizona, population you... Pressing the shutter button it was a good 2-3 seconds before the click finished, and there was just a blurred mess.

Well OK, it was probably a silly idea, I should wait for the moon again perhaps.

However flicking through some astronomy web sites and shops, wondering idly how much it would be to buy a 'scope of my own, and what do you get for your money I spotted some interesting bits on astrophotography.


For not very much money (well £20 or so) you can get a metal gizmo that sits on the eyepiece and has a couple of metal bits sticking out that allow you to screw the cameras tripod adaptor into, and suddenly the telescope and camera move as one! See the attached - if I had two cameras you could even see the camera in situ.

This was much easier to work with. You can even use the LCD display instead of the view finder. The only issue is that in the dark, without the camera attached, you stand a fairly reasonable chance of poking your eye out with the protruding metal spike - but hey, its a small price to pay.

A clear night arrived, and I had a play around. The results were not altogether as good as I had hoped, but at least there were results.


MarsMars again
Somewhere in Orion,
or maybe the Pleiades
Another Mars


Well - the results are not stellar (groan) but they are at least there.

Then I had the good fortune to notice that the Nottingham Astronomy Society were having a talk by a visiting speaker titled "Digital Astrophotography for Dummies" by Kevin Kilburn. I could perhaps pick up a few tips, perhaps join the society, get to use their 24inch reflector. At the very least I could find out if I was on the right lines. So off to check it out, on a cold, very wet night to see if Kevin has any tips I might use.

WOW!


He was getting some stunning photographs without any telescope at all, but using a digital SLR camera on a equitorial mount. The secret was to use a digital camera and take multiple exposure, and then use photoshop or similar to remove the street light pollution, and stack the multiple images on top of each other.


The results are excellent. I was well and truly inspired as I left the meeting. He was getting pictures better than a lot of professionals, and using them to propose new theories about the moon and other things. I mean - just look at this example of M31, the Andromeda galaxy, our nearest neighbouring galaxy. Many of these were taken from his own back garden, from which he can see 12 street lights.

This could end up as a relatively expensive night out in the long run...